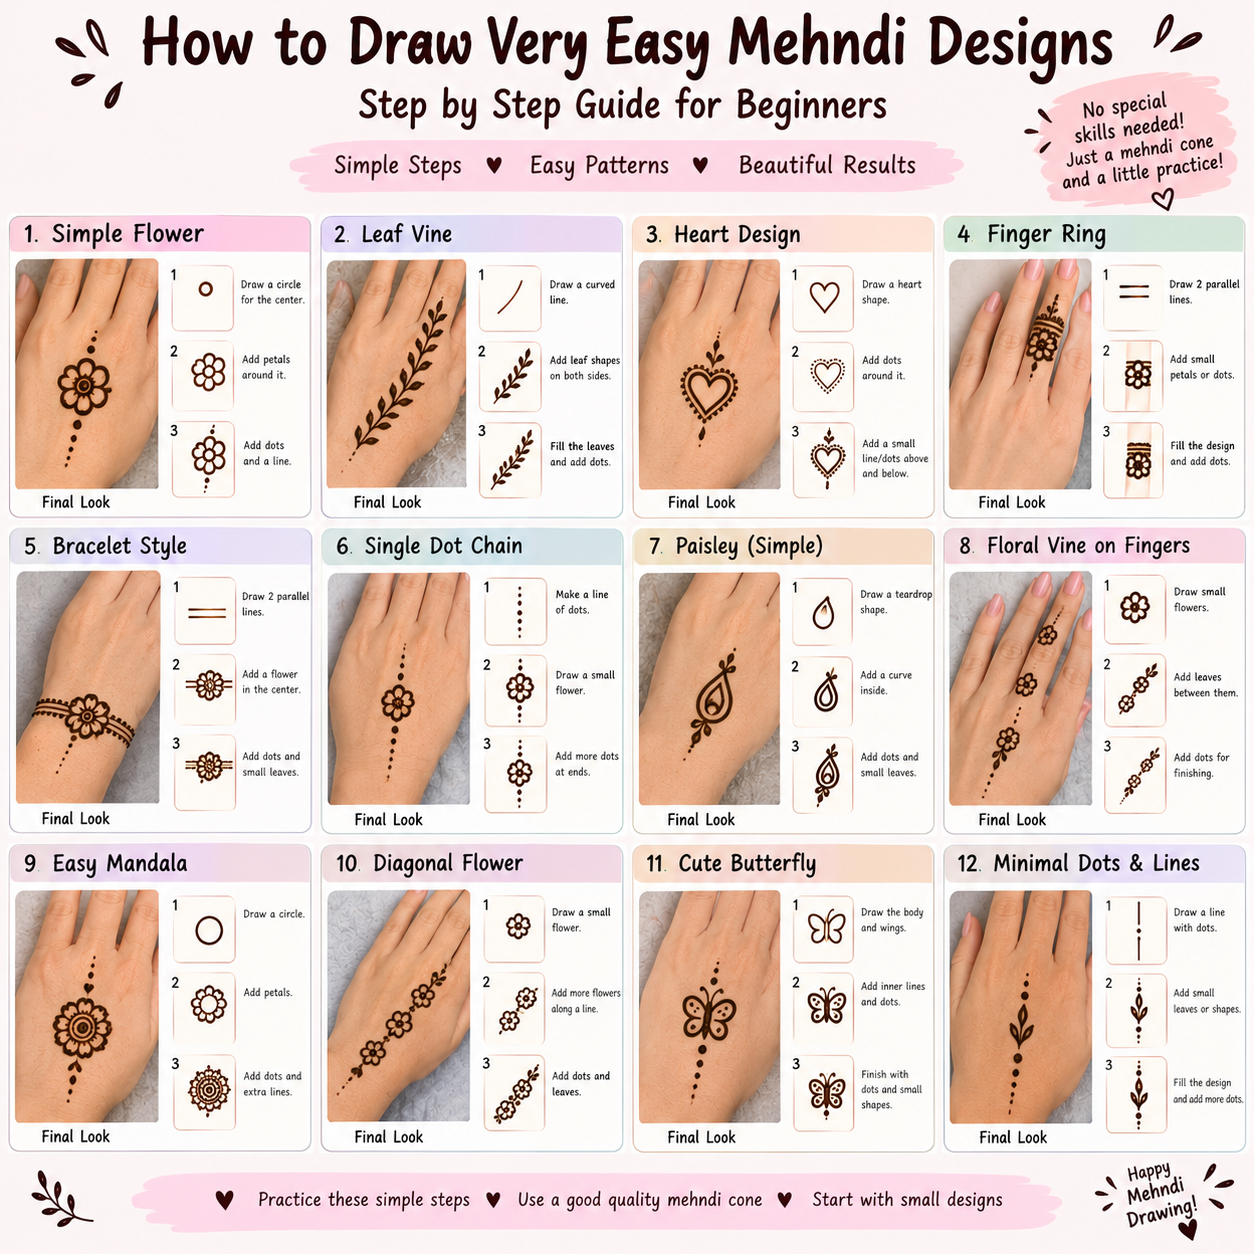

How to Draw Very Easy Mehndi Designs
Learning to draw mehndi designs starts with pencil and paper, not a henna cone — mastering a handful of basic shapes (dots, curves, teardrops, simple spirals) on paper builds the muscle memory that makes actual cone application far more successful later. Here's how to practice properly.
[IMAGE PLACEHOLDER: pencil sketch of basic mehndi shapes on paper — dot, curve, teardrop, spiral]
Why Drawing on Paper First Matters
A henna cone behaves differently from a pencil — the paste flows continuously rather than lifting cleanly off the page, and there's no eraser once it touches skin. Practising the actual shapes and motifs on paper first, where mistakes cost nothing, lets you build genuine familiarity with mehndi's visual vocabulary before you're committed to a cone's less forgiving medium. It's the same reason artists sketch before painting — the planning stage matters.
Basic Shapes to Master Before Anything Else
The dot: Sounds trivial, but consistent dot size and spacing is a real skill that underpins many designs.
The curve: A smooth, continuous curved line, the foundation of vines and petal shapes.
The teardrop: A rounded shape tapering to a point — the basis of most leaf and petal motifs.
The spiral: A curling, inward-winding line, used in many traditional and Arabic-style motifs alike.
[IMAGE PLACEHOLDER: hand tracing a spiral shape on paper as a practice exercise]
Step-by-Step: Drawing Your First Motif
Draw a single dot as your centre point. This anchors everything else you'll add.
Draw four or five teardrop shapes radiating outward from the dot. This alone creates a recognisable flower shape.
Add a curved line extending from the flower. This becomes the beginning of a connecting vine.
Add two small teardrop leaves along the curve. Angle them outward from the main line, not perfectly parallel.
Repeat the entire motif two or three times on your page. Repetition on paper builds consistency faster than drawing a single example once.
Building a Simple Pattern From Basic Shapes
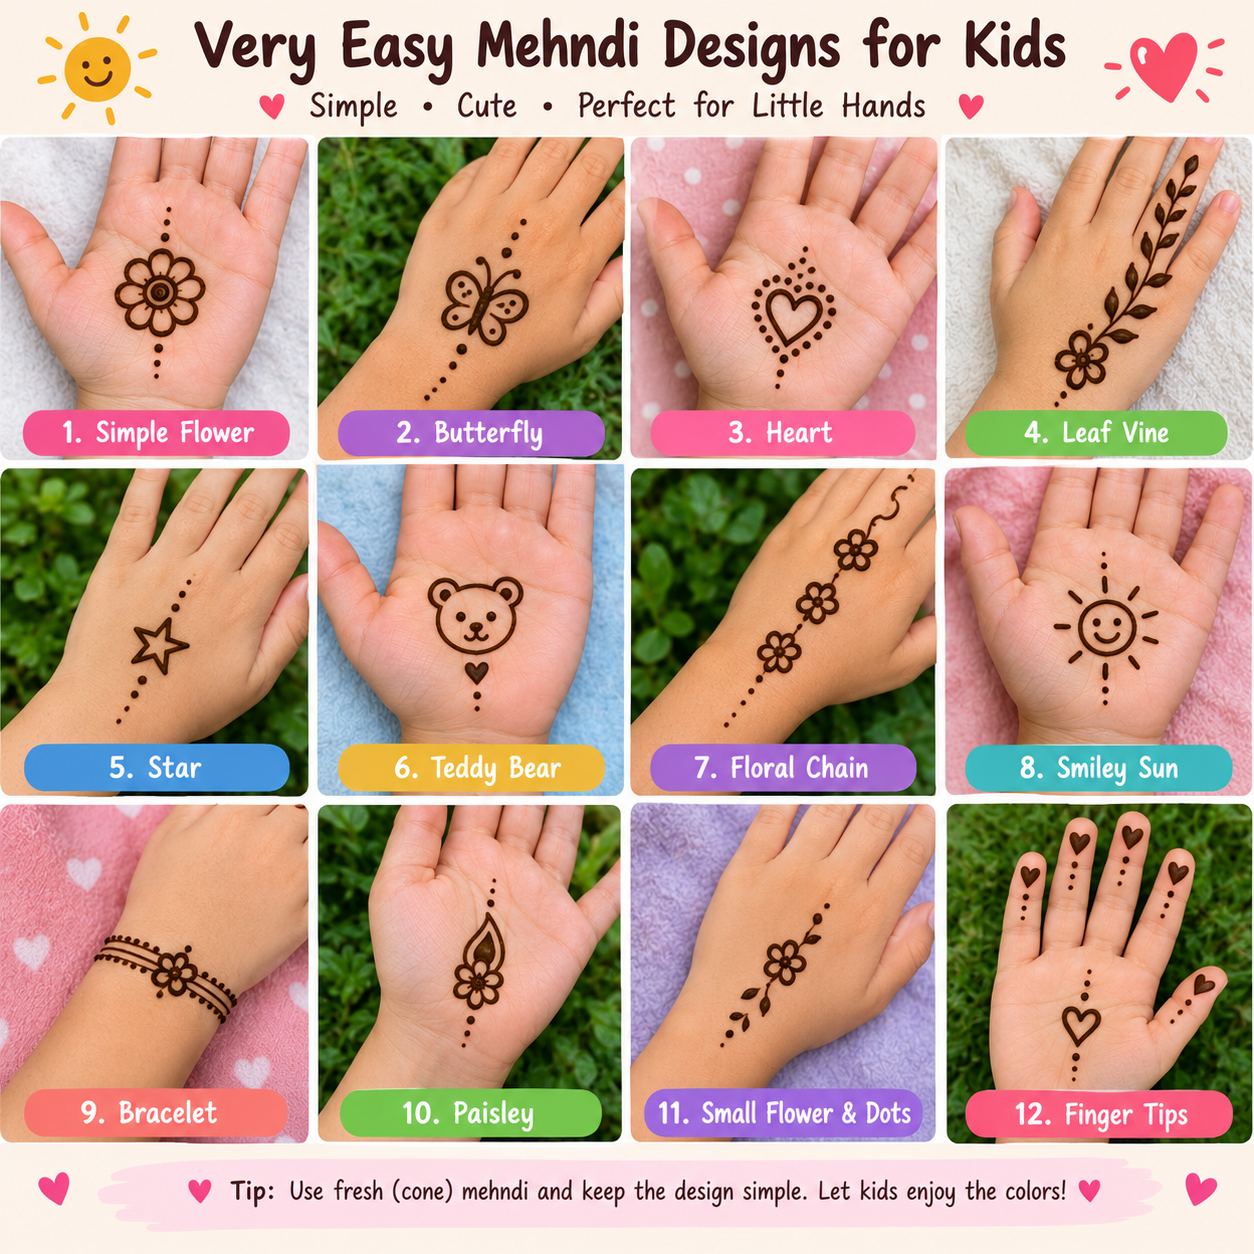
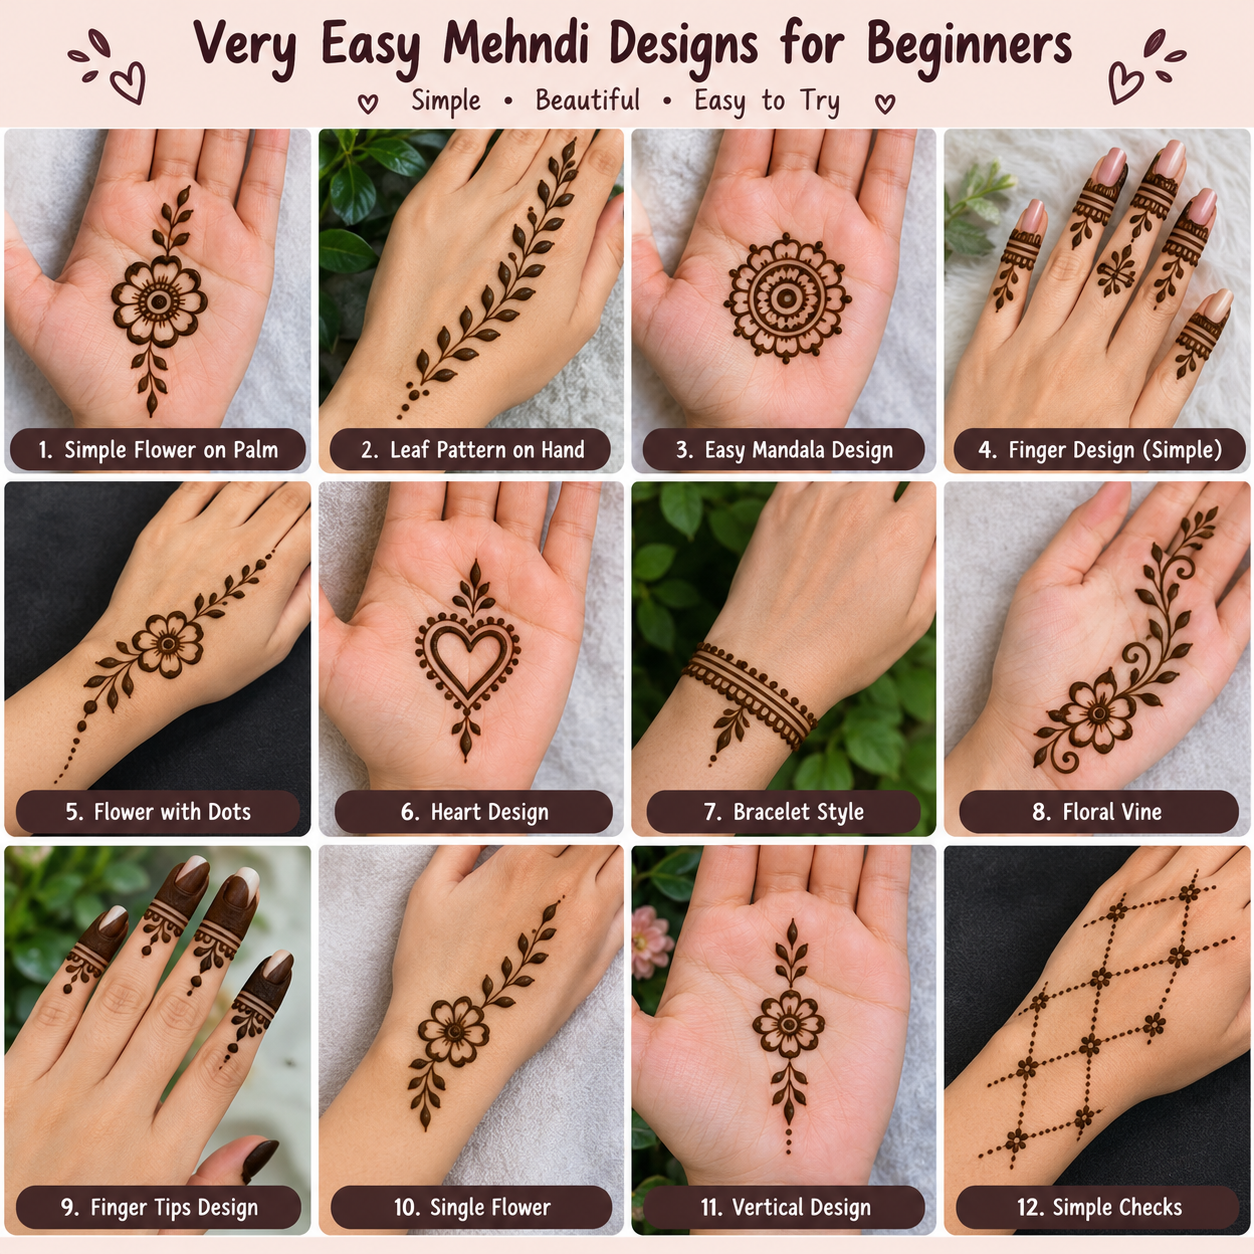
Once individual shapes feel comfortable, practice combining them into a small connected pattern — a flower linked to another flower by a single vine, bordered by a simple row of dots. This is genuinely how most real mehndi designs are constructed: not as one complex whole, but as familiar basic shapes arranged thoughtfully together.
Tools for Practising on Paper
A regular pencil works fine for early practice, since it lets you erase and adjust freely while you're still learning proportions and spacing. Once shapes feel natural in pencil, switching to a fine-tip pen removes the safety net of erasing and better simulates the commitment required with an actual cone.
Moving From Paper to Skin
Don't jump straight from your first successful paper sketch to a real event — do at least one or two practice runs with an actual cone on your own hand first, ideally days rather than hours before you need the design for real. Cone control genuinely differs from pencil control, and this transition step catches issues that paper practice alone won't reveal.
Common Drawing Mistakes
Rushing through repetitions is the most common issue — drawing the same motif quickly ten times teaches far less than drawing it slowly and deliberately three or four times, paying attention to proportion and spacing each time. Beginners also often skip straight to combining shapes into a full pattern before any single shape is genuinely consistent on its own, which just compounds small errors across the whole design.
How Long Practice Takes Before You're Ready
Most people can draw the basic shapes fairly consistently within a few short practice sessions spread across a few days. Building comfort with a full connected pattern usually takes a bit longer, but there's no fixed timeline — the real marker of readiness is feeling comfortable repeating your chosen motif without consciously thinking through each stroke.
Using Grid Lines to Keep Proportions Even
Lightly sketching a small grid or a few guide dots on your paper before drawing a motif helps keep petals and elements evenly sized and spaced, rather than drifting larger or smaller as you work around a shape. This is a common technique real mehndi artists use mentally even when they're not physically drawing a grid — training your eye to notice proportion this way on paper makes it far easier to judge spacing intuitively once you're working freehand on skin.
Common Beginner Drawing Errors to Watch For
Uneven petal sizes within the same flower motif are one of the most common tells of an early attempt — practice deliberately checking that each petal roughly matches its neighbours before moving on. Another frequent issue is drawing motifs too close to the edge of the available space, leaving no room for a proper border or finishing touch; leaving a visible margin from the start avoids having to awkwardly compress the end of a design.
Find Mehndi Artists on WeddingBuzz
If you'd rather skip the practice period entirely for an upcoming event, WeddingBuzz features mehndi artists who can deliver a polished design without the learning curve.
Keeping a Practice Sketchbook
Rather than practising on loose sheets that get discarded, keeping a dedicated small notebook lets you flip back and compare your earliest attempts to more recent ones, which is genuinely motivating once you see real progress laid out side by side. It also becomes a useful personal reference library of motifs you've already practised and feel confident with, rather than needing to relearn a shape you drew successfully weeks earlier.
Frequently Asked Questions
Why practice drawing on paper before using a henna cone?
Paper practice lets you build familiarity with basic shapes and motifs risk-free, before committing to a cone's less forgiving, continuous flow.
What tools do I need to start practising?
A regular pencil is enough to begin — switch to a fine-tip pen once basic shapes feel comfortable, to better simulate cone commitment.
How long until I'm ready to try it on skin?
There's no fixed timeline, but most beginners feel reasonably ready after a few focused practice sessions spread across several days.
Does drawing skill transfer directly to cone application?
Mostly yes for shapes and composition, though cone control itself takes a bit of separate practice, since the paste flows differently than pencil or pen ink.
Conclusion
Treat paper practice as a genuine first step, not something to rush past — a handful of confidently drawn basic shapes gives you a real foundation before you ever pick up a cone.
Want a design done professionally instead? Browse Vendors on WeddingBuzz | Call: +91 73100 30003